Low-Impact Engine Bay Cleaning: A Step-by-Step Guide
Cleaning your engine bay doesn’t have to mean heavy scrubbing, awkward reaching, or blasting everything with a pressure washer. With the right approach, you can keep your engine bay looking great using low-impact techniques that are easier on your body and safer for sensitive components.
This guide walks through a simple, ergonomic method that works well for enthusiasts of all ability levels.
Why Clean Your Engine Bay?
A clean engine bay isn’t just about appearance.
Benefits include:
- Easier maintenance – leaks and worn components are easier to spot
- Reduced buildup – grease and debris can trap heat
- Improved resale value – a tidy engine bay signals a well-cared-for vehicle
- More enjoyable DIY work – it’s simply nicer to work in a clean space
Low-impact cleaning focuses on gentle tools, minimal water, and better body positioning to make the job easier.
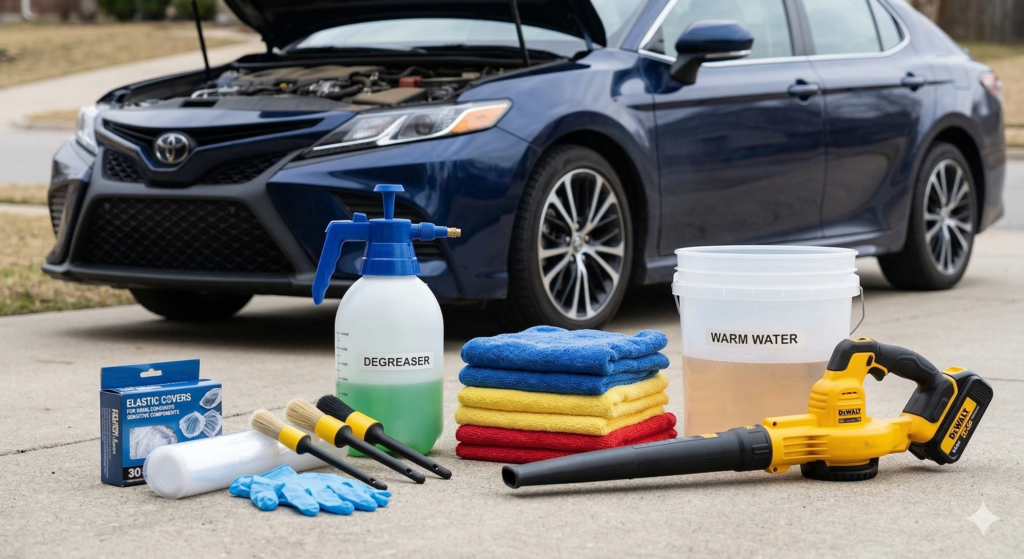
Tools You’ll Need
Choose lightweight, ergonomic tools whenever possible.
Recommended items:
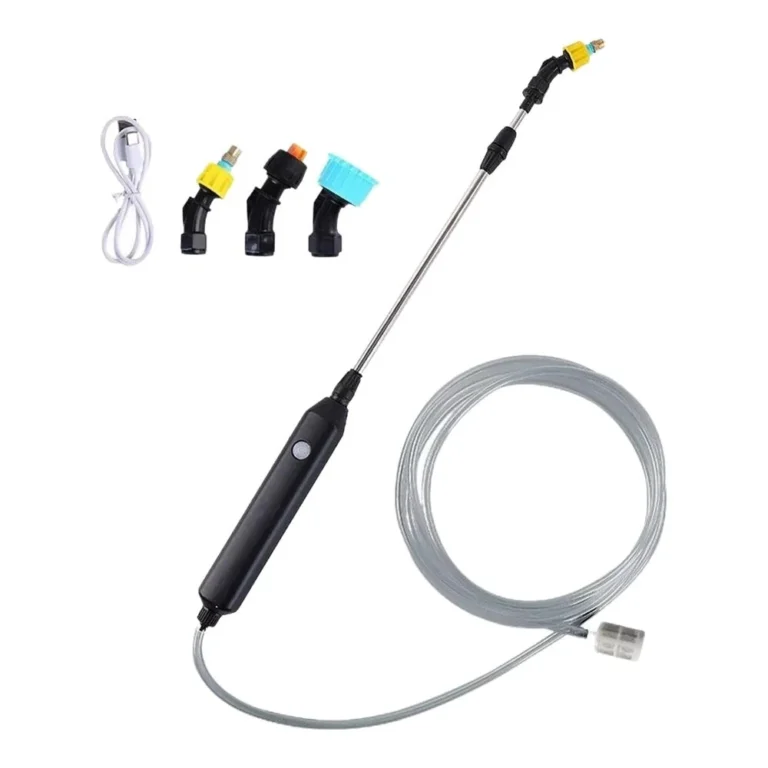
- Pump sprayer or spray bottle with degreaser or all-purpose cleaner
- Soft detailing brushes
- Microfiber cloths or towels
- A small bucket with warm water
- Plastic bags or covers for sensitive components
- A battery-powered handheld blower or compressed air
- Nitrile gloves
Tip: A pump sprayer is easier on the hands than constantly squeezing a trigger bottle.
Step 1: Work on a Cool Engine
Always start with a completely cool engine.
Working on a hot engine can:
- Damage plastic components
- Cause cleaners to dry too quickly
- Increase the risk of burns
If you’ve recently driven the car, let it cool for 30–60 minutes before starting.
Step 2: Cover Sensitive Components
Before applying any cleaner, cover electrical areas that don’t like moisture.
Common areas to protect:
- Battery terminals
- Alternator
- Exposed wiring
- Aftermarket electronics
Use plastic bags secured loosely with tape or rubber bands.
This step only takes a minute and helps avoid problems later.
Step 3: Remove Loose Dust and Debris
Start dry before introducing any liquids.
Use:
- A soft detailing brush
- A handheld blower or compressed air
Focus on:
- Corners of the engine bay
- Around caps and reservoirs
- Plastic covers and trim
This removes loose dust so you’re not turning it into muddy residue later.
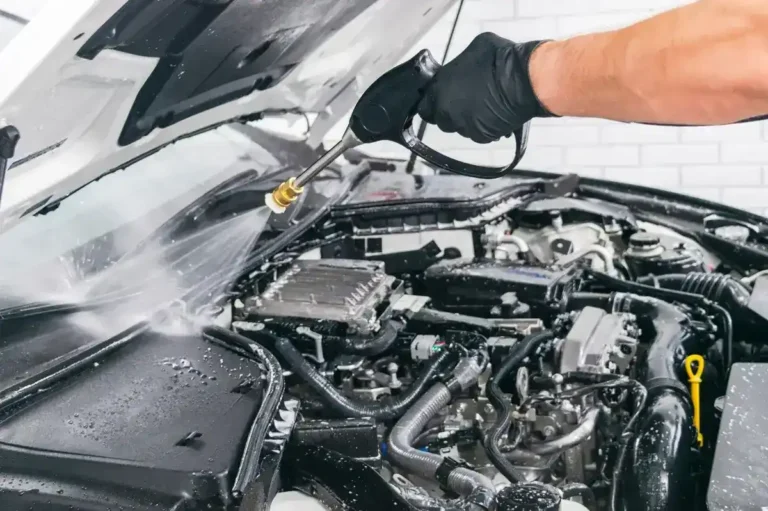
Step 4: Apply a Gentle Degreaser
Lightly mist your cleaner onto dirty areas.
Low-impact tips:
- Use a pump sprayer to reduce hand strain
- Spray onto a brush or cloth for tighter areas
- Work in small sections
Let the cleaner dwell for 30–60 seconds, but don’t let it dry.
Avoid soaking the engine—light misting is enough.
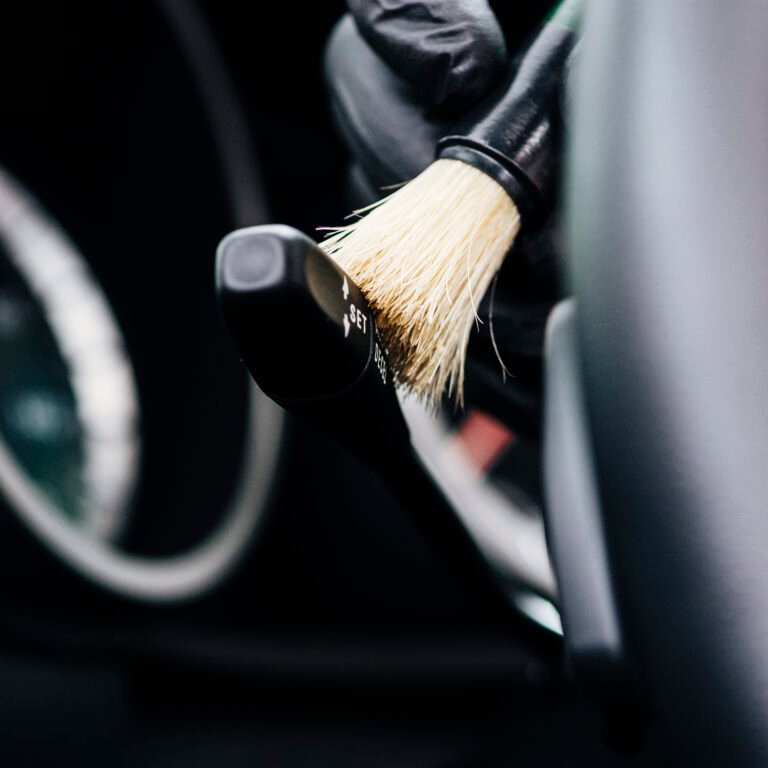
Step 5: Agitate with Soft Brushes
Use soft detailing brushes to loosen grime.
Work gently around:
- Plastic covers
- Hoses and connectors
- Reservoir caps
For ergonomic comfort:
- Use long-handled brushes to reduce reaching
- Rest your forearms on the car’s frame when possible
- Take short breaks between sections
The goal is light agitation, not aggressive scrubbing.
Step 6: Wipe Instead of Rinsing
Instead of blasting the engine with water, use a controlled wipe-down.
Method:
- Dampen a microfiber cloth in your bucket
- Wipe away loosened grime
- Follow with a dry microfiber towel
This low-water method reduces risk to electrical components and keeps the process more manageable.
Step 7: Dry the Engine Bay
Drying prevents water spots and trapped moisture.
Helpful tools:
- Microfiber towels
- A battery-powered blower
- Compressed air for tight spaces
Focus on areas where water collects, such as:
- Around ignition components
- Under plastic covers
- Along seams and edges
Step 8: Optional – Dress Plastic and Rubber
For a finishing touch, apply a plastic or rubber dressing.
Benefits:
- Restores faded plastic
- Adds UV protection
- Makes future cleaning easier
Apply sparingly with a microfiber applicator and wipe off excess.
Low-Impact Tips for Easier Cleaning
If mobility or fatigue is a concern, these tips help reduce strain:
- Use a small step stool to avoid leaning too far over the engine bay
- Work in short sessions rather than one long session
- Keep tools within easy reach in a detailing tray or cart
- Choose lightweight cordless tools whenever possible
Small ergonomic changes can make car care far more enjoyable.
How Often Should You Clean an Engine Bay?
For most drivers:
- Light clean: every 3–4 months
- Full clean: once or twice per year
If you drive in dusty conditions or store your vehicle outside, you may want to clean it more often.
Final Thoughts
Engine bay cleaning doesn’t have to be complicated or physically demanding. By using low-impact techniques, minimal water, and ergonomic tools, you can safely maintain a clean engine bay without unnecessary strain.